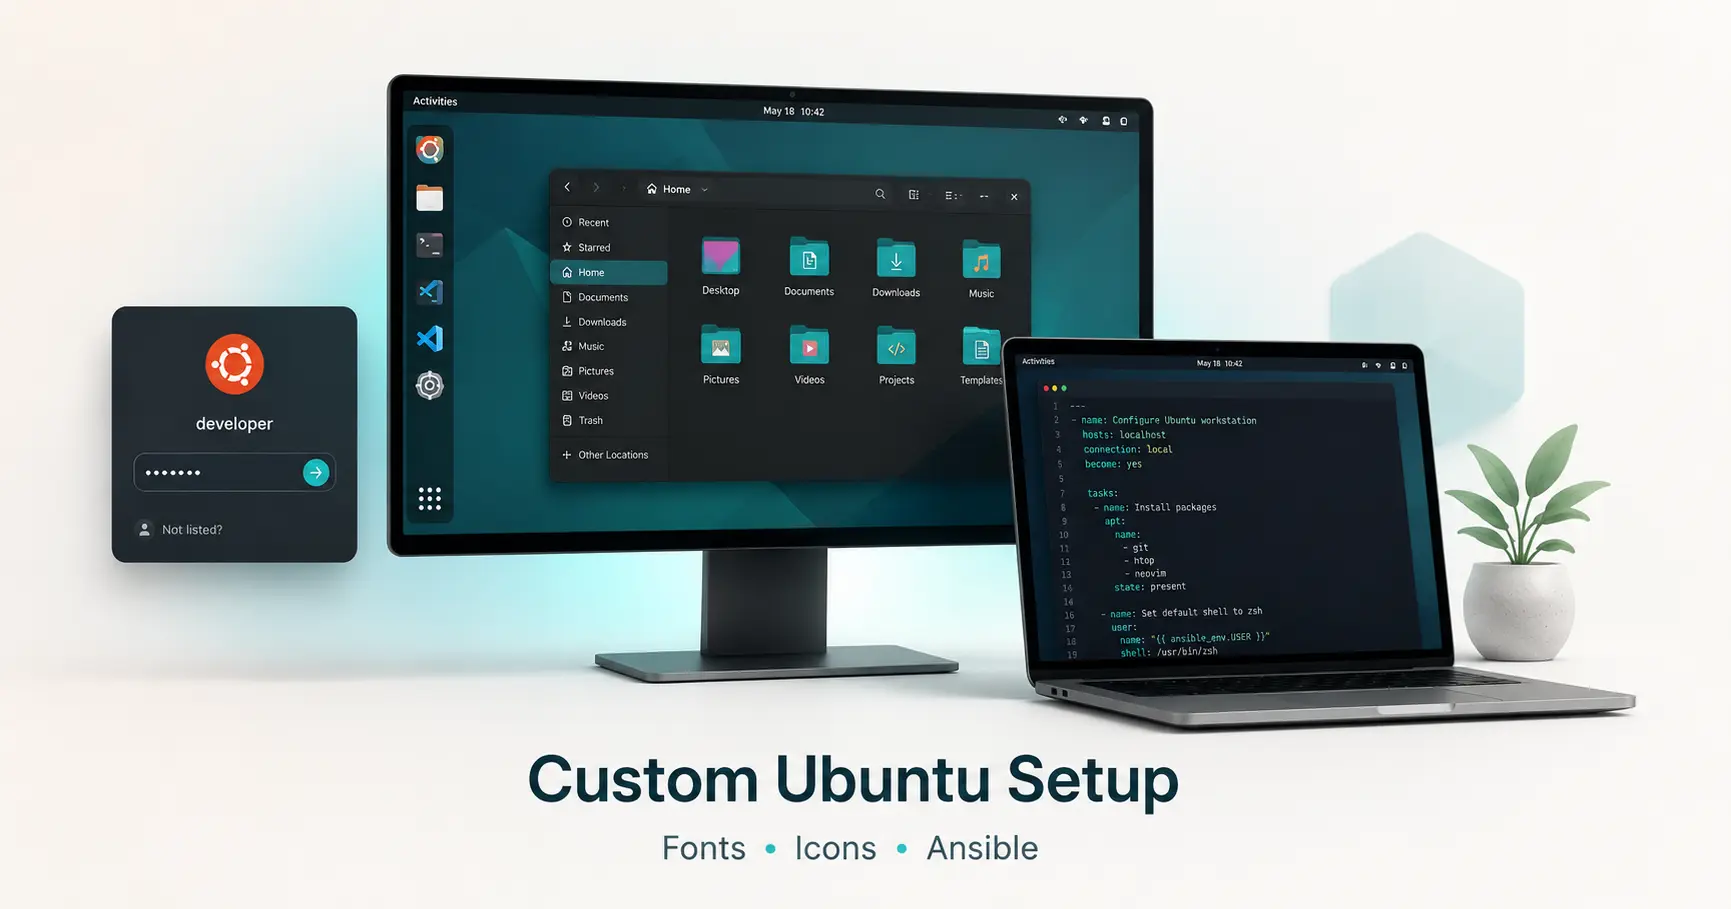
I like Ubuntu, but there was one thing that kept bothering me every time I installed it on a new computer: the fonts never looked quite right.
This was especially noticeable on a normal 24-inch 1080p monitor running at 100% scaling. Text often looked softer than I was used to on Windows, even though the monitor was running at its native resolution.
Eventually, I stopped treating Ubuntu's default appearance as something I simply had to accept.
I changed the font. Then the icons. Then the font rendering. Then I discovered that the login screen is effectively a separate GNOME environment and has to be configured separately.
Once I had everything looking the way I wanted, another question came up:
Why should I have to remember all of this the next time I install Ubuntu?
That led me to Ansible and the idea of turning my Ubuntu configuration into something I could reproduce automatically on another PC.
This guide explains the whole process.
Start with the fonts
Fonts have a surprisingly large effect on how an operating system feels.
You can use the same monitor, resolution and scaling and still find that Windows, macOS and Linux render text differently.
Instead of endlessly tweaking Ubuntu's default font, I decided to replace it with Inter.
Inter is an open-source typeface designed specifically for computer interfaces. It is clean, highly readable and works particularly well at normal desktop UI sizes.
On Ubuntu, install it with:
sudo apt update
sudo apt install -y fonts-inter
You can check that Ubuntu can find it with:
fc-match InterYou should get something similar to:
Inter-Regular.otf: "Inter" "Regular"That means Fontconfig can resolve the font correctly.
Make Inter the Ubuntu interface font
Installing Inter does not automatically make GNOME use it.
Set it as the main interface font with:
gsettings set org.gnome.desktop.interface font-name 'Inter 11'Then set the document font:
gsettings set org.gnome.desktop.interface document-font-name 'Inter 11'And use Inter Bold for window titles:
gsettings set org.gnome.desktop.wm.preferences titlebar-font 'Inter Bold 11'I keep a proper monospace font for terminals:
gsettings set org.gnome.desktop.interface monospace-font-name 'DejaVu Sans Mono 11'Inter is a proportional interface font, so it should not replace the monospace font used in terminals and code editors.
Font rendering matters too
Changing the font helped, but I also wanted text to look sharper.
GNOME Tweaks exposes more font-rendering controls than the normal Ubuntu Settings application.
Install it with:
sudo apt install -y gnome-tweaksMy preferred font settings are:
Antialiasing: Subpixel
Hinting: Full
Scaling factor: 1.00
You can apply the same settings from Terminal:
gsettings set org.gnome.desktop.interface font-antialiasing 'rgba'
gsettings set org.gnome.desktop.interface font-hinting 'full'
gsettings set org.gnome.desktop.interface text-scaling-factor 1.0
My complete desktop font configuration therefore becomes:
gsettings set org.gnome.desktop.interface font-name 'Inter 11'
gsettings set org.gnome.desktop.interface document-font-name 'Inter 11'
gsettings set org.gnome.desktop.wm.preferences titlebar-font 'Inter Bold 11'
gsettings set org.gnome.desktop.interface monospace-font-name 'DejaVu Sans Mono 11'

gsettings set org.gnome.desktop.interface font-antialiasing 'rgba'
gsettings set org.gnome.desktop.interface font-hinting 'full'
gsettings set org.gnome.desktop.interface text-scaling-factor 1.0
Not every Linux application renders text through exactly the same path. GTK applications, Qt applications, Electron apps and browsers can behave slightly differently, but this gives the desktop a much more consistent baseline.
Replace the default icons with Papirus
Once the fonts looked better, Ubuntu's default icons stood out more.
Linux uses icon themes rather than requiring you to replace individual image files manually. Applications request standard icon names and the active theme supplies the matching SVG or PNG asset.
My choice is Papirus.
Papirus has very broad coverage, looks modern without being overly decorative, and includes application icons, folders, status icons and many other interface elements.
Install it with:
sudo apt install -y papirus-icon-themeThen activate it:
gsettings set org.gnome.desktop.interface icon-theme 'Papirus'Check the active icon theme with:
gsettings get org.gnome.desktop.interface icon-themeYou should see:
'Papirus'Add a teal accent colour
I also prefer Ubuntu's deep green or teal accent colour.
You can select it normally from Settings → Appearance, or configure it directly:
gsettings set org.gnome.desktop.interface accent-color 'teal'My final appearance settings are therefore:
Inter 11 for the interface
Inter Bold 11 for window titles
Subpixel antialiasing
Full hinting
Text scaling at 1.00
Papirus icons
Teal accent colour
Install GNOME Tweaks and Extension Manager
I also want the normal GNOME customisation tools available on every machine.
sudo apt install -y \
  gnome-tweaks \
  gnome-shell-extension-manager \
  gnome-shell-extensions
This gives me GNOME Tweaks, Extension Manager and the standard GNOME extensions collection.
Move the Ubuntu dock to the bottom and centre everything
I prefer Ubuntu's dock at the bottom rather than on the left.
I also want the application icons centred, including the Show Apps button.
My dock configuration is:
gsettings set org.gnome.shell.extensions.dash-to-dock dock-position 'BOTTOM'
gsettings set org.gnome.shell.extensions.dash-to-dock extend-height true
gsettings set org.gnome.shell.extensions.dash-to-dock always-center-icons true
gsettings set org.gnome.shell.extensions.dash-to-dock show-apps-always-in-the-edge false
This gives me a full-width bottom dock with the application group centred.
The login screen is different
This was the part I initially missed.
After changing the desktop font to Inter, I logged out and noticed that the Ubuntu login screen was still using the old font.
The setting had not failed.
The login screen is provided by GDM, the GNOME Display Manager, and GDM does not run as your normal logged-in user.
It has its own configuration and its own dconf database.
This means a command such as:
gsettings set org.gnome.desktop.interface font-name 'Inter 11'changes your desktop session, but does not automatically change the login screen.
Check that GDM can see Inter
Because Inter was installed system-wide through APT, GDM should be able to access it.
Check with:
sudo -u gdm fc-match InterYou should see something similar to:
Inter-Regular.otf: "Inter" "Regular"Configure Inter and Papirus on the login screen
Create the GDM dconf directories:
sudo mkdir -p /etc/dconf/profile
sudo mkdir -p /etc/dconf/db/gdm.d
Create the GDM profile:
sudo nano /etc/dconf/profile/gdmAdd:
user-db:user
system-db:gdm
file-db:/usr/share/gdm/greeter-dconf-defaults
Then create an appearance configuration:
sudo nano /etc/dconf/db/gdm.d/01-appearanceAdd:
[org/gnome/desktop/interface]
font-name='Inter 11'
icon-theme='Papirus'
font-antialiasing='rgba'
font-hinting='full'
text-scaling-factor=1.0
Apply the changes:
sudo dconf updateThen reboot:
sudo rebootNow the login screen can use the same Inter font and Papirus icon theme as the normal desktop.
This is also much safer than editing GNOME Shell files directly under /usr/share, because files there belong to packages and may be replaced during updates.
Your profile picture also needs special handling
I also want the same profile picture on every Ubuntu computer I use.
My plan is to keep the image in Nextcloud and use a public share link.
The automation should first download that image into the normal Pictures folder:
~/Pictures/profile-picture.jpgOnly after that should it be used as the Ubuntu account picture.
The flow is:
Nextcloud public image
        ↓
~/Pictures/profile-picture.jpg
        ↓
Ubuntu user account
        ↓
GDM login screen
This means the original image remains easy to find in Files rather than being hidden away inside a system directory.
Then install the applications
A fresh Ubuntu installation also means reinstalling the same applications again and again.
My standard list is:
Google Chrome
Visual Studio Code
OpenCode
Google Antigravity
Audacity
RustDesk
Kdenlive
Thunderbird
Telegram
Xournal++
VLC
Tailscale
ONLYOFFICE Desktop Editors
Flatpak
Use official packages wherever possible
Linux often gives you several ways to install the same application.
You may find an Ubuntu package, Snap, Flatpak, AppImage, PPA, third-party repository and multiple community builds all for the same program.
I do not want an automated setup blindly choosing whichever package is easiest to install.
My preference is:
Official Snap
Official .deb package or official APT repository
Official Flatpak
Another official format if necessary
The word official matters more than the package format.
I do not want unofficial Flatpak clones or random PPAs installed just because they exist.
Replace LibreOffice with ONLYOFFICE
I remove LibreOffice from my Ubuntu installations and replace it with ONLYOFFICE Desktop Editors.
I don't want both office suites installed side by side. ONLYOFFICE becomes my primary local office suite for Word documents, spreadsheets and presentations.
The official Snap can be installed with:
sudo snap install onlyoffice-desktopeditorsLibreOffice can then be removed as part of the automated configuration.
Conceptually, the desired state is simply:
LibreOffice = absent
ONLYOFFICE = present
Add Tailscale to every PC
I also install Tailscale on every machine.
Tailscale creates a private network between your devices and is particularly useful if you have PCs, servers or self-hosted services that you want to reach remotely without exposing everything directly to the internet.
The setup should use Tailscale's own official Linux repository and installation method.
I would automate the installation itself, but not hard-code my login credentials or authentication secrets into the configuration.
That leads to a useful general rule:
Automate software and configuration, but do not casually store passwords, private keys or access tokens in your setup repository.
Audacity is the AppImage exception
Audacity is a good example of why the package rules should not be completely rigid.
If the project's own officially distributed Linux package is an AppImage, I would rather use that official AppImage than install an unofficial Flatpak just to satisfy a preferred package format.
So Audacity becomes an explicit exception:
Audacity → official AppImageThe setup can download the AppImage, make it executable and create a normal application launcher for it.
Doing all of this manually becomes ridiculous
At this point, setting up a fresh Ubuntu installation involves quite a lot:
Install Inter
Configure font rendering
Install Papirus
Set the teal accent
Configure the dock
Configure GDM separately
Download a profile picture from Nextcloud
Set the profile picture for the login screen
Install GNOME Tweaks
Install Extension Manager
Install GNOME Extensions
Install Flatpak
Install all my normal applications
Install Tailscale
Remove LibreOffice
Install ONLYOFFICE
Doing that once is fine.
Doing it again on a laptop, desktop, replacement PC or future reinstall is unnecessary work.
This is where Ansible becomes useful.
What is Ansible?
Ansible is a configuration-management and automation tool.
Instead of thinking only in terms of running commands one after another, you describe what state the computer should be in.
For example:
- name: Install appearance packages
  ansible.builtin.apt:
    name:
      - fonts-inter
      - papirus-icon-theme
      - gnome-tweaks
      - gnome-shell-extension-manager
      - gnome-shell-extensions
      - flatpak
    state: present
state: present means those packages should exist on the machine.
If Inter is already installed, Ansible can leave it alone.
If Papirus is missing, Ansible installs it.
If everything is already correct, there may be nothing to change.
This behaviour is known as idempotency.
Organise the configuration rather than creating one giant script
I would keep the setup in a Git repository with a structure something like this:
ubuntu-setup/
├── setup.sh
├── ubuntu.yml
├── tasks/
│   ├── system.yml
│   ├── appearance.yml
│   ├── gnome.yml
│   ├── gdm.yml
│   ├── profile.yml
│   ├── apps.yml
│   └── cleanup.yml
└── README.md
Each file has one clear job.
appearance.yml
Inter
Papirus
Font rendering
Teal accent
gnome.yml
Dock position
Centred icons
Show Apps placement
Other GNOME preferences
gdm.yml
Inter on the login screen
Papirus on the login screen
GDM dconf configuration
profile.yml
Download the Nextcloud profile image
Save it under Pictures
Assign it as the Ubuntu user avatar
apps.yml
Chrome
VS Code
OpenCode
Google Antigravity
Audacity
RustDesk
Kdenlive
Thunderbird
Telegram
Xournal++
VLC
Tailscale
ONLYOFFICE
cleanup.yml
Remove LibreOffice
Remove any other unwanted default applications
How to reproduce the setup on another PC
The Ansible configuration is not needed during the normal Ubuntu installer.
I would still install Ubuntu normally.
The process becomes:
Boot Ubuntu installer
        ↓
Install Ubuntu normally
        ↓
Create your user account
        ↓
Reboot
        ↓
Log into the fresh desktop
        ↓
Download your configuration repository
        ↓
Run setup.sh
        ↓
Ansible configures the machine
        ↓
Reboot
        ↓
Done
The bootstrap script can remain very small:
#!/usr/bin/env bash

set -e

sudo apt update
sudo apt install -y ansible

ansible-playbook ubuntu.yml --ask-become-pass
So after installing Ubuntu on another computer, the final experience could eventually be as simple as:
git clone YOUR-REPOSITORY
cd ubuntu-setup
./setup.sh
Enter your sudo password and let the configuration take over.
The final result
My target Ubuntu setup now looks roughly like this:
Ubuntu 26.04
│
├── APPEARANCE
│   ├── Inter 11
│   ├── Inter Bold window titles
│   ├── Subpixel antialiasing
│   ├── Full hinting
│   ├── Text scale 1.00
│   ├── Papirus icons
│   └── Teal accent
│
├── LOGIN SCREEN
│   ├── Inter
│   ├── Papirus
│   └── Personal profile picture
│
├── GNOME
│   ├── Tweaks
│   ├── Extension Manager
│   ├── GNOME Extensions
│   ├── Bottom dock
│   ├── Centred app icons
│   └── Centred Show Apps button
│
├── APPLICATIONS
│   ├── Google Chrome
│   ├── Visual Studio Code
│   ├── OpenCode
│   ├── Google Antigravity
│   ├── Audacity
│   ├── RustDesk
│   ├── Kdenlive
│   ├── Thunderbird
│   ├── Telegram
│   ├── Xournal++
│   ├── VLC
│   ├── Tailscale
│   └── ONLYOFFICE Desktop Editors
│
├── PACKAGING
│   ├── Official Snap preferred
│   ├── Official .deb/APT next
│   ├── Official Flatpak when appropriate
│   ├── Official AppImage where necessary
│   ├── No random PPAs
│   └── No unofficial Flatpak clones
│
└── REMOVED
    └── LibreOffice
The important part is no longer any individual font, icon theme or application.
It is that the entire desktop becomes reproducible.
If I reinstall Ubuntu, buy another laptop or replace a failed computer, I do not need to search old notes for forgotten commands.
I install Ubuntu.
I run my configuration.
The machine becomes mine again.

Comments (0)
No comments yet. Be the first to share your thoughts!
Leave a Comment
Your email address will not be published. Required fields are marked *